

Introduction to WordPress Hosting Migration Architecture
Executing a successful WordPress hosting migration requires a precise understanding of how the platform interacts with system infrastructure. A site is not merely a collection of static files; it is a dynamic application comprising a file system, a relational database, and an array of external network dependencies. When any of these components are altered or moved, the potential for failure points increases exponentially. To minimize or eliminate service disruption, migration must be treated as an engineering process rather than a simple file transfer.
This guide serves as a comprehensive technical reference for executing a WordPress hosting migration with absolute data integrity and zero unplanned downtime. By exploring the underlying mechanisms of data serialization, database design, filesystem permissions, and domain name system (DNS) propagation, this resource provides the technical frameworks required for low-risk infrastructure transitions. This guide does not cover basic site creation or general content management; it focuses exclusively on the migration lifecycle of existing production sites.
To successfully transition a site, engineers must address the historical behavior of the site’s environment, local server configurations, and external caching layers. When these systems are managed with methodical planning, structural anomalies such as broken serialization strings, database execution timeouts, and DNS-induced visitor routing errors can be mitigated before they impact live production environments.
Pre-Migration Planning and the WordPress Hosting Migration Rollback Strategy
Every infrastructure transition carries inherent risks, including data corruption, configuration mismatches, and prolonged service outages. Establishing a robust pre-migration plan and a functional rollback strategy is critical to managing these hazards. A reliable rollback protocol ensures that if a critical error occurs during the transition window, operations can immediately revert to the source environment without loss of transactional data or visitor access.
The foundation of any rollback strategy is the preservation of state. In dynamic environments, particularly e-commerce sites running WooCommerce or membership portals with frequent user interactions, the system state changes constantly. Capturing a static database backup at a single point in time is insufficient if transactions continue to occur on the source server after the backup is taken. Therefore, the first step in planning is determining the appropriate maintenance window—ideally during historical traffic troughs—and preparing to place the source site into read-only or maintenance mode to freeze the database state.
Looking for Blazing-Fast NVMe Cloud Hosting?
ChemiCloud delivers LiteSpeed-powered 100% NVMe storage, free 24/7 migration, a free domain, and an industry-leading 45-day money-back guarantee.
Get Up to 70% Off ChemiCloud Plans Today →A comprehensive backup checklist must be executed immediately prior to initiating the transfer. This checklist must cover three critical areas: filesystem assets, the database schema and contents, and server-level configuration files. The table below outlines the specific assets that require collection and verification before modifying any external DNS records or secondary service configurations.
Quick Summary
- Establish a clear rollback threshold: define the precise technical failure or time delay that triggers an immediate revert to the source environment.
- Freeze database state by putting the source site into maintenance mode before extracting final backups, preventing transaction loss.
- Retain all original DNS zone files and source server files for a minimum of seven days post-migration to handle edge-case data recoveries.
| Asset Category | Required Files & Configurations | Verification Method |
|---|---|---|
| Filesystem | /wp-content/ directory, including uploads, themes, and plugins. Custom root-level scripts. | Validate backup archive integrity via MD5 checksum comparison or test extraction in a local sandbox. |
| Database | Full MySQL/MariaDB database export (.sql file, ideally uncompressed or gzipped). | Verify the presence of ‘CREATE TABLE’ and ‘INSERT’ statements; check that the file is not truncated. |
| Server Config | .htaccess, nginx.conf redirects, wp-config.php settings, custom PHP-FPM pool directives. | Inspect configuration files manually for hardcoded server paths, custom rewrite rules, and memory limits. |
Phase 1: Database and File Extraction Mechanics
The execution of a WordPress hosting migration begins with extracting data from the source environment. This phase requires moving files and exporting the relational database with precise handling of metadata and database constraints. Naive copy operations often result in corrupted file permissions, missing hidden files (such as .htaccess), or truncated database dumps.
For the filesystem, utilizing a command-line interface (CLI) is far superior to standard File Transfer Protocol (FTP) due to speed, security, and preservation of file attributes. Secure Shell (SSH) access allows for the execution of archiving commands directly on the server. Compressing the files on the server using utilities like tar or zip reduces the transport size and preserves symlinks and file ownership. A typical secure extraction command using tar over SSH looks like this:
tar -czf site_assets.tar.gz -C /var/www/html/ .
This creates a compressed archive of the entire WordPress root directory. If SSH is unavailable, SFTP must be utilized instead of standard FTP to ensure all data in transit is encrypted. During SFTP transfers, client settings must be configured to binary transfer mode for non-text assets to prevent corruption of images and compiled files, and ASCII mode for text files such as PHP and CSS configurations.

Database extraction must be handled with equal rigor. Using web-based database management tools for large databases often causes execution timeouts, leading to incomplete SQL files. The standard industry practice is to perform database dumps via the command line using the mysqldump utility. This command bypasses web-server execution limits and directly queries the database engine, ensuring a complete and structured schema export. The dump should include flags to drop existing tables upon import to prevent duplicate key conflicts, and it must utilize the UTF-8 multibyte (utf8mb4) character set to preserve complex character encodings, emojis, and international text structures.
During this stage, special attention must be paid to the difference between system paths on the source and destination servers. Hardcoded directory paths within custom plugins or themes will fail if the directory structure of the new host does not match the old one. Identifying these custom directory configurations within the wp-config.php file or custom theme files prior to extraction is a critical step in avoiding path-resolution errors once the site is deployed to the new infrastructure.
Phase 2: Staging, Database Search-and-Replace, and Path Correction
Once files and database assets are successfully extracted and uploaded to the destination server, the site enters the staging and adaptation phase. Because WordPress stores absolute URLs and absolute file paths throughout its database—most notably within the wp_options table, custom post types, and metadata fields—simply importing the database onto a new host or domain will result in broken layouts, non-functional administrative dashboards, and resource loading failures.
This issue is compounded by PHP serialization. To preserve complex data structures like arrays and objects, WordPress and many of its plugins store data in serialized formats. A serialized string contains both the data value and its character length. For example, a serialized domain option might look like this:
s:19:"https://source.com";
If a simple database-wide search-and-replace query is executed in MySQL to replace “https://source.com” with “https://destination.com” (which has a length of 24 characters), the serialization string becomes invalid because the declared character count (19) no longer matches the actual character count of the new string (24). This structural mismatch causes PHP to reject the entire serialized block, leading to lost widget configurations, broken page builder designs, and deactivated plugins.
Key Takeaways
- Never use standard MySQL queries (like UPDATE and REPLACE) to change domain names or file paths, as this corrupts serialized PHP arrays.
- Utilize specialized search-and-replace scripts or WP-CLI commands that safely deserialize, update, and reserialize data structures.
- Verify that the destination database charset and collation match the source settings to prevent character corruption during import.
To safely modify these paths, engineers must utilize tools designed to handle serialized data. The WP-CLI toolset provides a robust command-line utility for this purpose. Running the command wp search-replace 'https://source.com' 'https://destination.com' --skip-columns=guid safely parses serialized data, adjusts string length indicators dynamically, and updates the database without risking structural integrity. The --skip-columns=guid parameter is critical, as the Globally Unique Identifier (GUID) column in the wp_posts table must remain unchanged to prevent RSS feed readers from re-indexing existing posts as new content.
In addition to database configuration, the core application configuration file, wp-config.php, must be adapted to the new environment. This involves updating the database name, database user, password, and hostname. Furthermore, if the new environment utilizes a different SSL termination architecture, reverse-proxy headers must be declared in wp-config.php to prevent infinite redirect loops. Setting the correct database prefix and updating custom security keys (salts) are also recommended practices during this stage to ensure maximum security on the new server.
⚠️ Common Issue: Error Establishing a Database Connection
Symptom: The website displays a white screen or a plain text message stating “Error Establishing a Database Connection” when accessed on the new server.
Likely cause: The wp-config.php file contains incorrect credentials, the database service is not running on the destination server, or the database host is misconfigured (e.g., using ‘localhost’ when the database is on a separate remote container or network socket).
Resolution: double-check DB_NAME, DB_USER, DB_PASSWORD, and DB_HOST values in wp-config.php. If using a standard local database, ensure MariaDB or MySQL is active using systemctl status mysql. If the host is correct, verify that the database user has been granted full privileges to the specified database on the destination host.
Phase 3: Domain Name System (DNS) and Zero-Downtime Transition
The critical point of any WordPress hosting migration is the cutover phase, where traffic is officially routed from the source infrastructure to the destination infrastructure. This transition is governed by the Domain Name System (DNS). Improperly managed DNS updates can result in several hours of site downtime, email delivery failures, and inconsistent user experiences due to staggered DNS propagation across global networks.
To achieve a seamless, zero-downtime cutover, the migration team must plan well in advance of the actual transition window. This process relies on adjusting the Time to Live (TTL) setting within the domain’s DNS zone file. The TTL determines how long DNS resolvers, internet service providers (ISPs), and local browsers cache the IP address of the domain. If the TTL is set to 86400 seconds (24 hours), any update to the domain’s A record could take up to a full day to reflect globally.
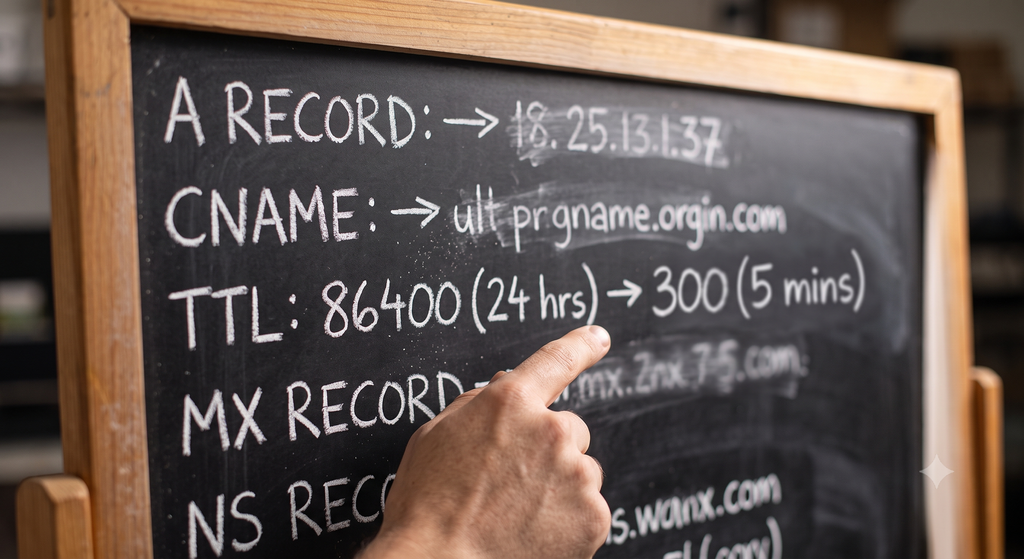
Approximately 48 to 72 hours before executing the migration, the TTL of all primary records (specifically A, AAAA, and CNAME records pointing to the website) should be lowered to a brief duration, such as 300 seconds (5 minutes). This instruction is distributed across global DNS registries, including authoritative systems like those monitored by the Internet Engineering Task Force. Once this preparation period has elapsed, any subsequent change to the IP address will propagate across the globe in a matter of minutes, allowing for an incredibly fast and controlled cutover.
Before updating the DNS records globally, the destination site must be thoroughly tested. Since the public domain still points to the source server, engineers can simulate the post-migration state locally by modifying their local operating system’s hosts file. By mapping the production domain name directly to the public IP address of the new destination server on their local machine, testers can navigate the migrated site, execute test transactions, and verify admin functionality as if the DNS change had already occurred. This step ensures that any lingering path errors or server configuration issues are caught and resolved before the general public is routed to the new environment.
In Short
- Lower DNS TTL values to 300 seconds at least 48 hours prior to cutover to ensure near-instantaneous global propagation.
- Test the destination server prior to global cutover by mapping the domain to the new server IP inside the local operating system’s hosts file.
- Keep both the old and new hosting environments active concurrently for 72 hours post-cutover to capture straggling traffic from outdated DNS caches.
Phase 4: Post-Migration Validation and Optimization
Once the DNS records are updated and traffic begins flowing to the new infrastructure, the validation and optimization phase begins. Even if local hosts-file testing was successful, the live production environment presents real-world variables, such as varying user agents, concurrent request volumes, and geographically distributed requests, which can surface unexpected behavioral issues.
The first priority in this phase is the provisioning and verification of Secure Sockets Layer (SSL) and Transport Layer Security (TLS) certificates. If the destination host uses an automated Certificate Authority like Let’s Encrypt, the validation process can only complete successfully after the DNS records point to the new server IP. If the certificate is not provisioned immediately, visitors will face security warnings. Ensuring that the SSL auto-renewal scripts are correctly scheduled via cron and verifying that the SSL protocol configurations on the server reject outdated, vulnerable standards like TLS 1.0 and 1.1 are critical security tasks.
Next, the internal URL routing structure of WordPress must be regenerated. Navigating to the Settings > Permalinks menu in the admin dashboard and saving the configuration forces WordPress to flush and rebuild its rewrite rules. This action regenerates or updates the .htaccess file (on Apache environments) or updates internal routing parameters, resolving common 404 errors on subpages that occur immediately after database imports.
Finally, application-level and server-level caching layers must be cleared and rebuilt. This includes flushing Object Caching (such as Redis or Memcached), clearing OPcache to ensure updated PHP scripts are compiled fresh, and emptying CDN caches like Cloudflare. Clearing these systems prevents the presentation of stale data to users and ensures that any asset optimization changes are immediately active across all delivery nodes.
⚠️ Common Issue: Mixed Content Warnings
Symptom: The browser displays an insecure connection indicator (broken padlock), and the developer console shows warnings about resources loading over HTTP instead of HTTPS.
Likely cause: Hardcoded HTTP references in CSS files, absolute image paths stored in database tables from older site versions, or an incomplete database search-and-replace during migration.
Resolution: Execute a targeted database search-and-replace using WP-CLI to change http://yourdomain.com to https://yourdomain.com. Additionally, verify that the SSL/TLS settings of any external reverse-proxies or CDNs are set to Full/Strict encryption to prevent transport-level degradation.
Common Failure Modes and Diagnostic Protocols
Even with meticulous planning, infrastructure transitions occasionally encounter anomalies. Understanding how to interpret server logs and system behaviors allows engineers to diagnose and resolve these issues swiftly. The table below documents the most common failure states encountered during migrations, along with their diagnostic indicators and remediation strategies.
Bottom Line
- Monitor server error logs (/var/log/nginx/error.log or /var/log/apache2/error.log) in real-time during cutover to intercept silent PHP crashes.
- Verify filesystem permissions strictly conform to the 755 (directories) and 644 (files) standard to block exploitation vectors.
- Maintain a clean database state by removing orphan tables left by uninstalled plugins, reducing memory overhead on the new server.
One of the most frequent silent failures is file permission drift. When files are transferred between servers via different protocols or under different user accounts, ownership attributes can change. If the web server process (e.g., www-data or apache) does not have write access to the wp-content/uploads directory, users will be unable to upload new assets. Conversely, if files are given overly permissive permissions (such as 777), the server becomes vulnerable to local file execution exploits. The standard security model requires directories to be set to 755 and files to 644. These permissions can be recursively applied via SSH using the chmod utility:
find . -type d -exec chmod 755 {} \;find . -type f -exec chmod 644 {} \;
Another common bottleneck is PHP memory exhaustion. A new hosting environment may have lower default limits than the source server, causing resource-heavy plugins or page builders to crash silently during rendering. Increasing the memory limit within the wp-config.php file via define('WP_MEMORY_LIMIT', '256M'); or adjusting the memory_limit directive in the server’s php.ini file is the primary resolution for these memory-induced application crashes.
| Error Code / Behavior | Primary Diagnostic Focus | Remediation Protocol |
|---|---|---|
| 500 Internal Server Error | Corrupted .htaccess rules, syntax errors in active theme files, or incompatible PHP versions. | Temporarily rename the .htaccess file to isolate rewrite engine issues. Check server error logs for fatal PHP errors. Verify the PHP version on the new server is compatible with active plugins. |
| 404 on Subpages Only | Missing or unreadable web server rewrite configuration (.htaccess or Nginx block). | Navigate to Settings > Permalinks and resave. For Nginx, verify the try_files directive is correctly structured inside the server configuration block. |
| PHP Memory Limit Exhaustion | Heavy page builders, extensive active plugin lists, or processing massive data payloads. | Increase memory limits in wp-config.php or php.ini. Identify resource-hogging plugins using database profiling tools. |
| White Screen of Death (WSOD) | Uncaught PHP Fatal errors, class collisions, or missing required PHP extensions. | Enable WordPress debugging in wp-config.php by setting WP_DEBUG to true. This prints the precise error file and line number directly to the screen or debug log. |
Ultimately, a successful transition is determined by methodical execution, structured validations, and immediate remediation of system alerts. By approaching each phase with technical depth and a clear rollback path, you protect operational continuity and secure the long-term health of the application on its new infrastructure.